
Publish websites from ChatGPT with the MCP connector
Last updated 16 September 2026
MakeMySiteLive runs a hosted MCP (Model Context Protocol) server, the same open standard Claude uses, so ChatGPT can publish and manage your sites too: create a site, deploy a ZIP, publish a single-file microsite, roll back a version, or set a password, all from a chat. Add it once as a custom Plugin, sign in, and it works within your own plan.
What you’ll need
- A MakeMySiteLive account (the first full site is free, microsites are unlimited, and no credit card is needed).
- A ChatGPT account with Developer mode available. Custom MCP plugins are a newer, elevated-risk ChatGPT feature, so exact availability and wording can change.
MCP connector URL
https://mcp.makemysitelive.com/mcpSteps
- 1
Turn on Developer mode
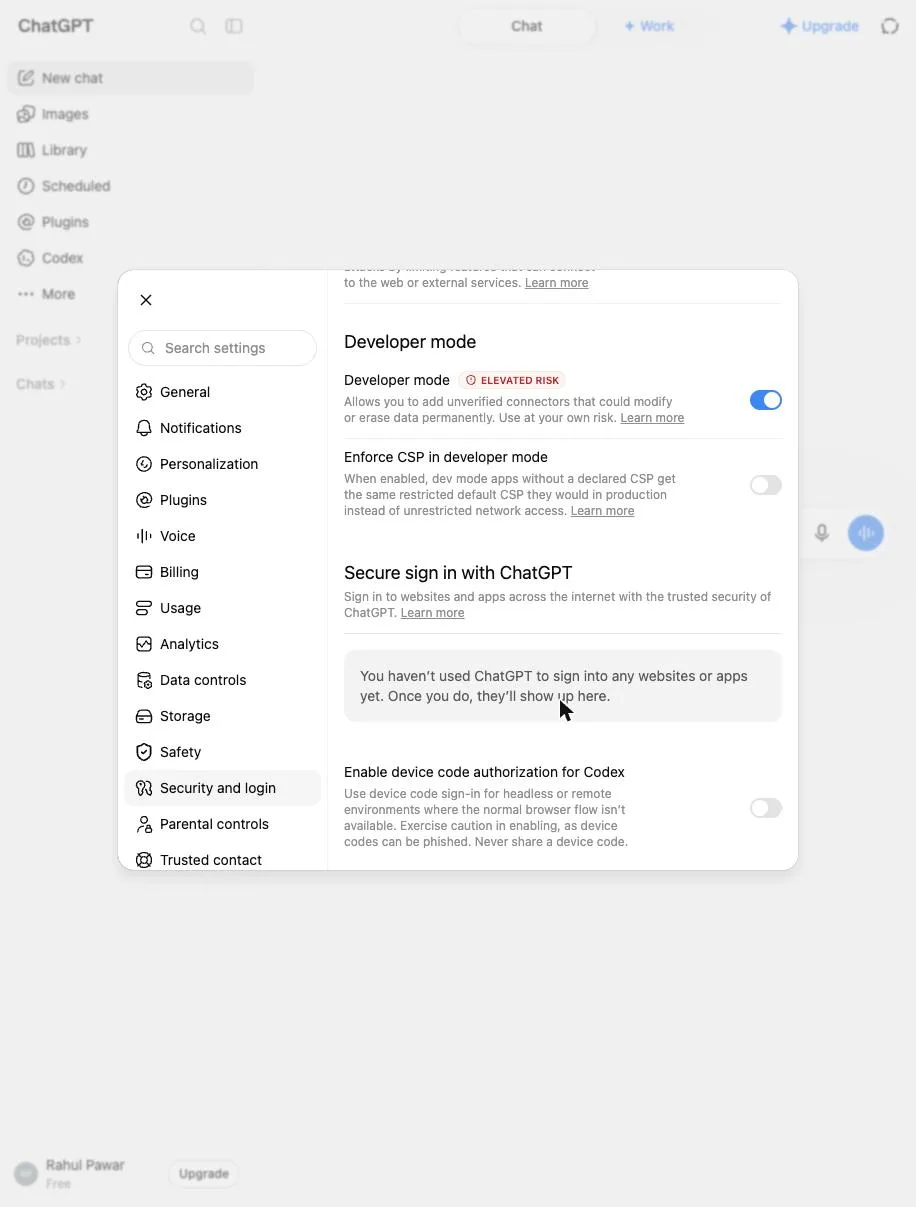
Click your account name at the bottom left of ChatGPT and choose Settings, then go to Security and login and switch on Developer mode. It's flagged as an elevated risk because it lets you add unverified connectors. That's expected, and it's what unlocks custom MCP plugins.
- 2
Open Plugins and click + for a new plugin
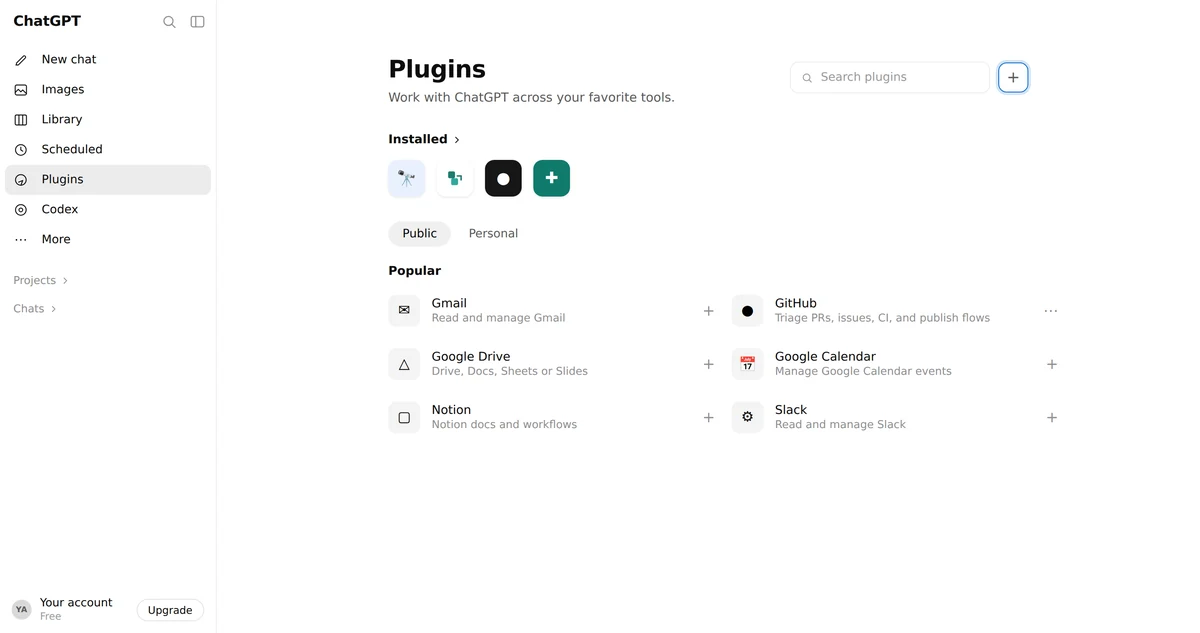
In the ChatGPT sidebar, click Plugins. This opens the Plugins page, with anything you've already installed at the top and Public/Personal tabs below. In the top right, click the + button to open the New Plugin dialog.
- 3
Fill in the connector's details
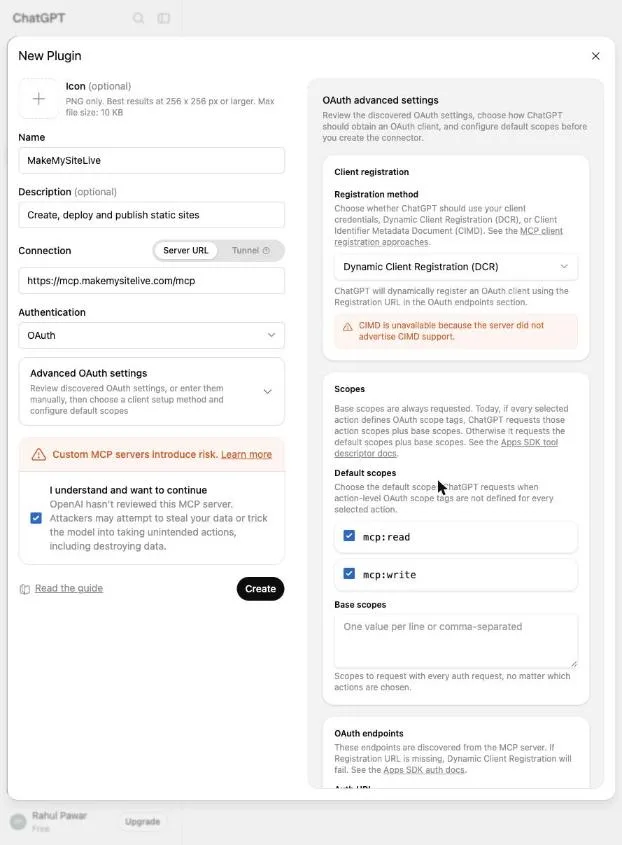
On the left of the New Plugin dialog:
- Name
- MakeMySiteLive
- Connection
- Leave it on Server URL, and paste https://mcp.makemysitelive.com/mcp
- Authentication
- OAuth. Choosing it opens an "OAuth advanced settings" panel on the right, already filled in from what ChatGPT found at that server URL. Leave every field there as its default:
- Registration method
- Leave on Dynamic Client Registration (DCR). A note that CIMD is unavailable is expected, so ignore it.
- Default scopes
- Leave both mcp:read and mcp:write checked. This is what grants full access.
- Base scopes
- Leave empty.
- OAuth endpoints
- Leave alone. It is discovered automatically from the server.
Back on the left, check "I understand and want to continue" (the standard warning for any unreviewed custom MCP server), then click Create.
- 4
The plugin is created, but not installed yet
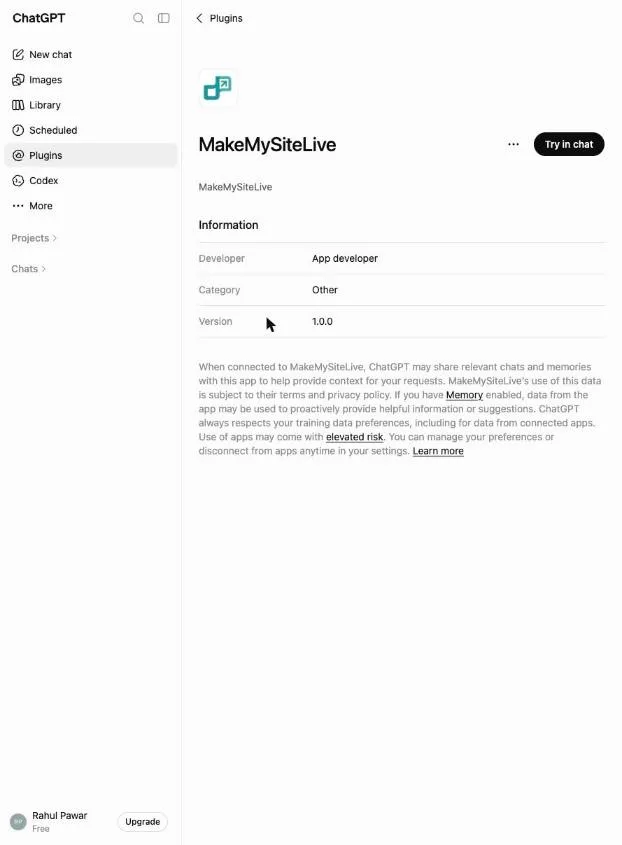
ChatGPT opens MakeMySiteLive's own page with a Try in chat button and its Developer/Category/Version details. This confirms the plugin was created; it still needs to be installed before it'll show up in a chat.
- 5
Install it and sign in
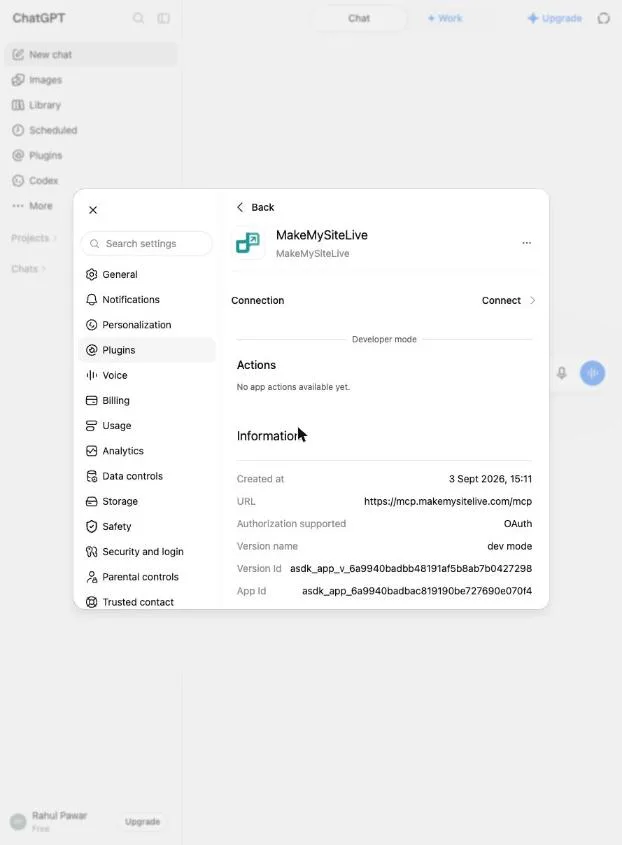
Open Settings → Plugins, select MakeMySiteLive under Developer mode, and click Connect. This runs the OAuth sign-in for your own MakeMySiteLive account. Approve it, and the plugin is installed and scoped to your plan.
- 6
Start a chat
Plugins work in both Chat and Work across ChatGPT's web, desktop, and mobile apps, so you can use MakeMySiteLive from your regular chat. OpenAI's own MCP connector quickstart tests new connectors from a Work chat, so if you want to follow that exactly, switch the tab at the top from Chat to Work first.
- 7
Publish by chatting
Type @ in the message box, pick MakeMySiteLive from the list, and ask it to “publish this HTML as a microsite” or “create a site called my-demo and deploy this ZIP.” It checks the subdomain, publishes, and returns the live yourname.makemysitelive.com URL. No dashboard needed.
Frequently asked questions
What is the MCP connector URL?
The MakeMySiteLive MCP server is hosted at https://mcp.makemysitelive.com/mcp. Paste that single URL into the New Plugin dialog's Connection field. There is nothing to install or run locally.
Why do I need Developer mode?
ChatGPT gates any custom (unreviewed) MCP server behind Developer mode in Settings → Security and login. It's a one-time toggle, not something you need per plugin.
Why is there a separate install step after creating the plugin?
Creating a plugin just registers it under your Personal tab. It isn't wired into a chat yet. Opening it under Settings → Plugins and clicking Connect is the step that runs the OAuth handshake and actually installs it.
Why does ChatGPT warn me about custom MCP servers?
OpenAI shows that notice for any custom MCP server, not just this one, since it hasn't reviewed it directly. The connection still runs over OAuth scoped to your own MakeMySiteLive account.
What can ChatGPT actually do once it's connected?
Read actions: see your account and plan, list full sites and microsites, view a site's versions, and check subdomain availability. Write actions: create a full site, publish a single-file microsite, deploy a ZIP, roll back a version, set password protection, and delete a site.
Is it safe to connect?
Yes. The connection uses OAuth. You sign in with your own account and approve access, and the agent acts only as you and only within your plan limits. You can remove the plugin at any time from ChatGPT's Plugins page.
Is this different from Claude's setup?
Only in where the settings live. Both use the same MCP connector URL and the same MakeMySiteLive account; ChatGPT calls it a Plugin, gated behind Developer mode, Claude calls it a custom connector under Customize.
Related guides
More: all guides · comparisons · pricing